Reposted from RasberryPi on blogger over here...
Installing the Raspberry Pi Camera Module - Part 1
Ok, so lets have a look at what you get for your hard earned cash. The ruler is included in the photos to give an idea of scale. The actual camera is tiny and is mounted on a board which is only about 25mm x 25mm:
The camera board comes with a pre-fitted ribbon cable which is about 15 cm long. The following photos show front and back views of the complete assembly as supplied.
Unfortunately the camera module isn't quite "plug and play" and there are a few preparatory tasks to perform before before it can be used with the Raspberry Pi.
First of all you need to download the latest release of the Raspbian "Wheezy" operating system from www.raspberrypi.org and install it on a freshly formatted SD(HC) memory card (4GB or larger). At the time of writing the most recent release is dated 2013-02-09. I've covered in detail how to make a bootable SD(HC) card in a previous post so I won't repeat it here.
The first time you boot from this new SD(HC) card "Raspi-config" will run automatically. Use the "expand_rootfs" option to expand the root partition on the SD(HC) card to use all the available space (how to do this is covered in detail in a previous post).
Now choose the "memory_split" option and press Enter:
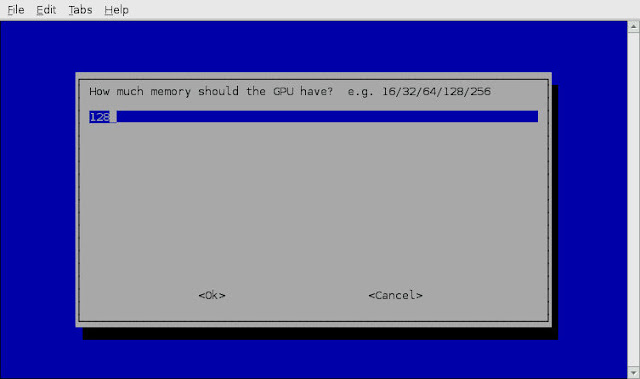
This option allows you to specify how much memory to allocate to the graphics processor. Type in "128" and press Enter:
Now select "Finish" and allow your Raspberry Pi to reboot. Then log in and run the "sudo apt-get update" and "sudo apt-get upgrade" commands. Details of how to do this can be found here if you need them.
Let your Raspberry Pi reboot and then run the "Raspi-config" commmand again by typing "sudo raspi-config" at the command line prompt and pressing Enter:
pi@raspberrypi ~ $ sudo raspi-config_
There should now be an option to enable camera support. Use the arrow keys to move down to the "camera" command and press Enter:
Select "Enable" and press Enter:
When you return to the Raspi-config main screen select the "Finish" option and then reboot your Raspberry Pi.
Your Raspberry Pi should now be ready for the camera module, but just to be sure, go into the GUI, launch "Leafpad" and open the file "/boot/config.txt". Scroll down to the bottom of the file - the last few lines in the file should contain the entries "gpu_mem=128", "start_file=start_x.elf" and "fixup_file=fixup_x.dat" as shown in the following screenshot.
In my next post I'll explain how to connect the camera module to the Raspberry Pi and get it up and running.
![that destination from [our] conversation](https://blogger.googleusercontent.com/img/b/R29vZ2xl/AVvXsEi5-n4tBCnwKdDjQjLTzOSaJ28jrO-n4Em9oR2kW7-FQL2Bd1jtyW9zQ31gO9AuCnu4h3v5JRq2ka7oEr_GGfKNKnl-ifB0yeE5ize_hPPT3jFK_g59SBQP0Anrexu2K_5jjz0yUKT0JR68/s1600/gwr2.jpg)


No comments:
Post a Comment